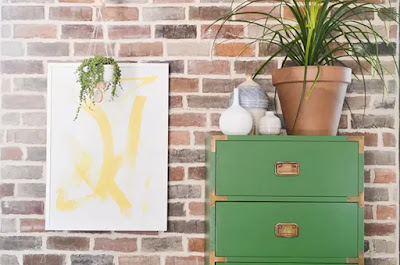
Refinishing old wooden furniture can be a creative and rewarding DIY project that provides you with high-quality pieces for your home. Whether you’re restoring a family heirloom or you’ve found a diamond in the rough, the following tips for refinishing wood furniture will help you in your next project.
Is the piece painted?
Was the piece built solidly?
Is it stable or will it need to be re-glued?
Wood Furniture Refinishing Supplies Checklist
- Dish soap, sponges and towels
- Paint stripper
- Power sander
- Sandpaper in multiple grits
- Paint scrapers (plastic or metal)
- Epoxy putty
- Wood sealant/Varnish/Polyurethane
- Wood stain or paint (be sure to pick the correct color)
- Drop cloths
- Wax coating product
- Eye protection
- Latex gloves
- Vacuum cleaner
- Paintbrushes
- Painter’s tape
- Plenty of clean rags and cloths
- A bucket for clean water
- Stir sticks
- Glue and clamps for repairing and reinforcing furniture if needed
Best Tips for Refinishing Furniture
Step 1: Clean the Piece
Step 2: Assess the Furniture’s Current State
Step 3: Remove Old Finish
Sanding:
Chemical Stripper:
Stripping with Max Strip Paint & Varnish Stripper
- Wear protective gear including eye goggles, and gloves.
- Read the chemical stripper product label before beginning and follow as directed (especially the amount of time to let the stripper sit on the surface of the wood).
- Use drop cloths or plastic underneath the furniture before sanding or using the chemical stripper.
- Apply chemical stripper using fast and even brushstrokes as the product will begin to evaporate.
- Use a brush to get into grooves.
- Reapply another coat of stripper over the top of any finish that doesn’t remove after 30 minutes of soaking.
- Let the piece air dry for 24 hours before moving on to the next step.
- Dispose of the leftover chemical products safely by first checking with your local waste disposal company. (Max Strip product can be disposed of safely in your household garbage)
Step 4: Apply a Coat of Sealant
Step 5: Stain or Paint the Wood
- If the piece is antique, you may not want to paint over it so it can retain its authenticity.
- If you don’t like the existing color or grain of the wood, then you may prefer it to be painted a different color.
- If the piece will be used in a high-traffic area, it may be more resistant to damage with a stain and sealant than with paint.
- If the piece isn’t constructed from high-quality materials, then you may choose to paint it to make it look better.
- There are several options to choose from when it comes to stains. There are water-based, oil-based or gel stains. There are also products that are a two-in-one stain and finish. Be sure to follow the instructions on the product label before beginning the staining step. There are many colors to choose from so be sure to test the stain color on another piece of wood before applying it to your furniture.
- Paints also have multiple options to choose from. There are different paint finishes such as oil-based enamel or latex that will provide a durable coating. Follow the instructions on the product label before applying the coat of paint.
Step 6: Apply a Coat of Finish
- The wood furniture look you desire
- The durability you need
- The type of wood your furniture is made from
- How the item will be used and how frequently
- Your own skill level


